Whether you are building a new home or remodeling an existing bathroom, a Delta Shower System with Hand Shower will help you create the shower of your dreams! Why choose a normal Delta shower faucet with a single showerhead when you can make your shower experience more enjoyable and add tons of functionality with the addition of a handheld sprayer?
If you haven't already, Take a look at our more general guide to Delta Shower Systems. In the general article you will get an overview of how a shower system works, how to build a shower system, and you will learn about the many different types and configuration options available. You can also check out our 1000s of pre-built complete custom shower systems.
This particular article will explain different components and features to consider specifically when planning a Delta shower system with handheld spray and showerhead. It will also explain how to install a Delta shower system with hand spray.
Installing a delta shower faucet with hand held is probably a task best left for a professional, but you can learn a lot about the job requirements if you keep reading. Choosing the perfect shower system can help make your dream bathroom a reality!
Our helpful infographics (below) illustrate how everything in your shower system will connect inside the wall. We will also outline the placement of the fixtures for optimal results. This article even has a video that will help you explain the basic set-up required for a handheld shower with showerhead complete shower system. Make sure to scroll down and check it out!
To create a Delta shower faucet with hand shower system you will need several component fixtures. You can also browse our pre-built Shower Systems with Showerhead and Hand Shower Sprayer to get inspired. You might even find we have the perfect configuration already for sale! The components necessary to create a complete Delta shower system with handheld sprayer are the mixing valve and control, the diverter valve and control, the showerhead, arm, and flange, plus the hand shower and drop elbow. Read on to learn more!
At its core, a shower faucet with handheld shower head is the same as any normal shower faucet. You plumb your hot and cold water lines into the shower rough-in valve where the water is mixed to a comfortable warm temperature. This warm temperature water is what will flow out of the handheld shower sprayer and the showerhead in your shower system. From the mixing valve outlet port, warm water runs in a pipe up into the diverter valve. We recommend choosing a Delta MultiChoice universal high flow (HF) mixing valve unless you plan to add a tub spout to your shower system (read more below). The mixing valve installs in the wall, and the trim kit and handle attach after adding the tile. The shower control handle trim kit contains either a thermostatic shower cartridge or a pressure balanced cartridge. Either can work for a shower head and hand held faucet system but make sure to consult a professional for optimal results. You can also Read More about Delta Thermostatic Cartridges
To run a showerhead and handheld shower at the same time you need a shower system with a 3-setting shower diverter. A three setting shower diverter lets you turn on the showerhead only, the hand shower spray wand only, or both together at the same time. This configuration provides a multi showerhead experience and also offers the versatility of a detachable hand sprayer. The diverter has an input port for the warm water from the mixing valve and outlet ports to divert the water to the two spray outlets. The diverter valve also has a third outlet port. However, in the case of a shower faucet system with shower head and hand shower only, this third outlet port will be capped by your plumber as it is unnecessary in this configuration.
Most people are fairly familiar with showerheads but you're planning your dream shower system so take this opportunity to get the exact showerhead you want! You can choose an overhead rain showerhead, an invigorating full body spray showerhead, a soothing Delta H2O kinetic showerhead, a multi-setting showerhead, or another great option! Spend some time thinking about what kind of shower arm you would like. Do you want the standard type where the shower arm sticks out of the wall so the water from the showerhead hits you at an angle? Or would you prefer a shower arm with a 90-degree bend so you can experience a falling rain effect. The shower flange is a small decorative piece with an important job, it covers the hole in your wall where the pipe sticks out! In the example shower system, we are showing Delta's large overhead rain showerhead mounted to a shower arm with a bend. This bend helps accommodate for the thickness of showerhead and gives you more clearance. The decorative wall flange really completes the look.
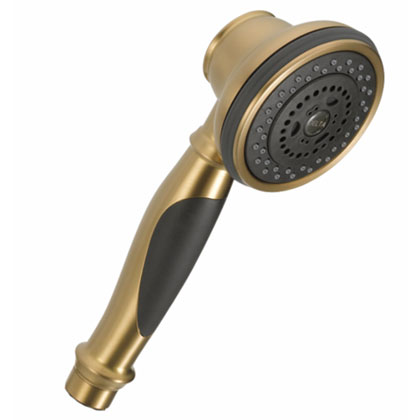
A Delta shower system with hand shower requires a compatible handheld sprayer and a drop elbow to connect to the internal plumbing. Hand Showers put water where you want it! Tasks like rinsing out shampoo, shaving legs, bathing children, washing pets, and cleaning the shower itself are all made easier with a delta shower system with wand. Hand showers usually include a slidebar for mounting. The slidebar has a mounting bracket that lets you move the hand shower sprayer up and down and holds it in place. Some hand showers simply have a wall bracket that is fixed to the wall. Either way, the hand shower itself is one of the greatest things you can add to your shower. A Delta rain head and handheld shower with diverter, like our example system, has tons of versatility. You can mount the hand shower higher on the slide bar and enjoy a dual head shower spray system. Or you can detach the hand spray when needed. When choosing your hand spray, consider whether you want a multi-setting or single setting hand spray. From full body spray to a concentrated massage spray to a pause function (and everything in between), a hand spray really brings an element of luxury to you shower.
A drop elbow is another small piece with an important job. This 90 degree wall elbow connects your shower system to the mixed warm water being output by the diverter. Once the drop elbow is connected to the pipe in the wall, you simply screw the hand shower hose to the threaded outlet and your hand shower will be ready to use! Don't forget about this important fixture when planning out your shower faucet with handheld sprayer.
Delta Shower Head with Separate Hand Held Sprayer Systems are our most popular configuration, however they are definitely not one size fits all. There are the obvious decisions you'll need to make before ordering, such as what finish do you like best, and do you want a modern or traditional style Delta shower faucet with separate hand held shower? There are also some less obvious things to be aware of when selecting the perfect Delta shower faucet with handheld spray. While the overall function will be the same, incorporating some of these options lets you customize your shower system exactly how you want!
Delta shower fixtures are designed such that the cartridge comes as part of the trim kit, rather than as part of the valve (as is the case with some other manufacturers). A thermostatic shower cartridge gives you the most precise control over water temperature and pressure. Thermostatic cartridges keep the water temperature in a strict range and prevent sudden changes in water pressure, which can occur when demands are placed on your pipes from water use in other areas of the house. Before modern thermostatic and pressure balanced shower cartridges, flushing the toilet in one bathroom might cause a person taking a shower in another bathroom to receive an unpleasant burst of freezing cold or boiling hot water. More importantly however, when it comes to a Delta shower head and handheld set, a thermostatic shower cartridge offers the highest gallon per minute flow rate of any Delta shower cartridge. For a shower head with separate hand held sprayer system, having higher water pressure is key to an enjoyable experience. When you have more than one spray outlet making water demands on the system, having more water pressure can make a huge difference.
Read more about what makes a Delta 17T thermostatic shower cartridge great. You can also shop our pre-built thermostatic shower system with hand shower kits.
For both style and convenience, many customers prefer a simpler way to operate their showerhead with handheld system. While it's not possible to operate a shower system with just a single handle alone (too many settings), it is possible to have a single plate with all controls grouped together. This makes the operation of your shower system easy and gives your shower a sleek design. Delta created their shower controls with integrated diverter to make operating a large shower head with hand sprayer system easy! An integrated diverter control merges the mixing valve and trim kit, and the diverter valve and trim kit, into a single unit. Rather than having two separate valves to install, you'll only have one. Instead of having two trim kits to install, you'll also only have one. This makes both the installation and operation of your shower system easier!
Read more in our guide to Delta Shower Controls with Integrated Diverter. We also have many pre-built custom shower systems that incorporate this unique fixture. Check them out here: Shower Systems with Integrated Diverter Control.
Many Delta showerheads feature their patented H2Okinetic technology. When shopping for Delta shower systems with handheld shower, look for the mention of "H2Okinetic". Many showerheads, and even some hand showers, have this special H2Okinetic design. As illustrated below, H2Okinetic shower heads are designed to give you the feeling of more water, without actually using more water. As you are browsing and determining your preferred Delta shower heads and handheld spray, if you see the term H2Okinetic you can reference back to this image and you'll understand what it means! Especially when building a custom shower system, where water flow rate is always a concern, H2Okinectic showerheads are a great option to consider.
When creating your shower system you are not only limited to a normal hand shower with slide bar. Take a look at our Delta grab bar shower systems which substitute an ADA approved safety grab bar in place of a normal hand shower slide bar. A dual shower head system with grab bar gives you the best of both worlds. You can enjoy your amazing new shower system and have the extra piece of mind offered by a bathroom safety grab bar. Delta grab bars for handheld showers provide a stylish way to add this important feature. A normal hand shower slidebar cannot support any significant weight at all. Normal slide bars are only for holding the hand shower itself and are not meant to be grabbed. By comparison, a Delta hand shower grab bar on can support up to 500 pounds of force when properly installed according to the manufacturer's instructions.
A great looking hand shower slide bar / grab bar combination helps provide bathroom and shower safety for you and your family. Creating a Delta ADA grab bar hand shower system is easy! Delta makes several styles of hand shower kits that include a grab bar. When you are planning your shower system, consider adding one so you can enjoy your new Delta grab bar shower system safely for many years to come!
If you need tub shower combination faucet in your bathroom, that doesn't mean you can't take advantage of a Delta shower system with handheld spray. Some of the best shower faucets and handheld faucets also include a tub spout! You could argue that a handheld shower sprayer is even more useful while taking a bath. A hand spray makes washing your hair in the tub a breeze!
Adding a tub spout to any of our Shower Systems with Showerhead and Hand Shower Sprayer is easy! Simply switch the high-flow (HF) valve to a Delta universal Multichoice tub/shower valve and add your favorite tub spout with pull-up diverter. You could make things even easier by ordering one of our pre-built shower systems with tub spout.
Keep in mind, you cannot add a tub spout via a port off the diverter. Due to water pressure issues, Delta does not recommend this. Rather, the tub spout must to be plumbed off the mixing valve directly. Because Delta's high-flow rough-in valve is permanently capped at the bottom, you will not be able add a Tub Spout to a shower system that utilizes this fixture. Instead you will need to switch to a standard Delta universal mixing valve (either with or without stops). Don't worry too much about switching away from the high-flow valve. Unless you have very poor water pressure in your home, the standard valve should have more than enough pressure to power most configurations of tub shower and hand spray systems. We'll talk more later in this article about water pressure issues but always consult a professional if you are concerned. Further down you will find additional instructions about adding a tub spout along with some helpful graphics that illustrate the proper installation process.
Fixtures with Delta Temp2O technology contain a small LED digital display that shows the actual water temperature (in degrees). The screen also features color indicators which visually signal different temperature ranges (cold, warm, hot). Enjoy the convenience of knowing when the temperature is right for you! Temp2O technology can be found in showerheads, hand showers, and also on mixing valve control trims. Deciding whether or not to incorporate this cool new technology in your Delta shower with separate hand held system is something you should consider! You can read our Delta Temp2O shower fixture buying guide to learn more and watch a video showing what Temp2O looks like in action.
You can also take a look at our pre-built shower systems with Temp2O technology. You may find we have already designed the perfect configuration for your shower!
Now that you know the basics of what it takes to create a system with a shower head with separate handheld using Delta fixtures, it's time get excited! Your new dream Delta shower faucet with hand held sprayer is going to be a huge improvement from your old shower. Not only will it be great to add a hand held multi function shower for practical reasons, but you also have the opportunity to turn your shower into a beautiful Zen space by choosing the perfect style and color!
Delta manufactures products in four main finishes: Chrome, Stainless Steel, Champagne Bronze, and Venetian Bronze. Each of the main colors works well with certain design aesthetics. If you want a modern gold shower system with handheld shower, take a look at Delta's Champagne Bronze. Or perhaps you would prefer a more traditional style Venetian Bronze shower system with handheld. A Delta showerhead with separate hand shower in chrome is transitional and will work great in both modern and traditional style rooms. Delta shower systems with separate hand shower in stainless steel offer a smooth contemporary modern feeling.
Delta makes it easy to find matching fixtures by grouping their products into collections. Collections all feature distinct design elements which visually tie the various products in the group together. You can browse all Delta Collections by going to our Delta Manufacturer Page and scrolling to the "Delta Faucet Product Collections" section.
You'll usually find the collection name stated in the product title. For example, a Delta Cassidy shower head and handheld is in the Cassidy collection. A Delta Addison shower with handheld is in the Addison collection. If you see Delta Dryden shower heads and separate handheld that indicates the shower system is in the Delta Dryden collection. Delta has a wide range of collections which allow you to easily find matching fixtures for your entire bathroom. While you are ordering your Delta Compel hand held shower system, why not get the matching Compel collection bathroom faucet, tub filler faucet, and bathroom accessories. Decorating your bathroom becomes both easy and fun!
At faucetlistmart.com, shopping by collection or finish couldn't be easier! Check out our Delta Faucet brand page and you will find all the great ways we have to find the perfect product for your home!
In the planning stage you to decide what kind of mixing valve you want, what type of diverter, which hand shower, what type of showerhead, and figure out all the connector fixtures like the shower arm and drop elbow. You can also let us help make things easy by simply choosing one of our pre-built Delta shower systems with hand shower. We make sure to include everything your plumber will need for installation!
After deciding on all the component fixtures, features, collection, style, and finish of your shower head with separate hand held sprayer system, there are just a few more things you should consider to ensure your system performance will be optimal.
After you have chosen all the fixtures for your shower faucet system with handheld showerhead, you should take a moment to sketch out your shower design and decide roughly where you want everything to go. Don't limit yourself to a single wall! It's possible to have a showerhead on one wall and a hand shower on another. One idea is to have the mixing valve near your shower entrance so you can turn on the water and give it time to warm up before getting in. Then put the diverter further in so you can operate it while actually standing in the warm water spray. If you plan to have a shower seat or bench, now is a good time to think through where the controls should be so they can be operated by a person who is sitting. When the walls are open, the pipes can be run inside the wall virtually any way you want. Please make sure to comply with all your local plumbing codes as some placement options are limited by regulation. This is an area where having a knowledgeable installer can really be an asset.
It's a smart idea to jot down all the measurements on your placement sketch to make sure the spacing makes sense. Consider the diagram below and read through the suggested measurements provided by Delta.
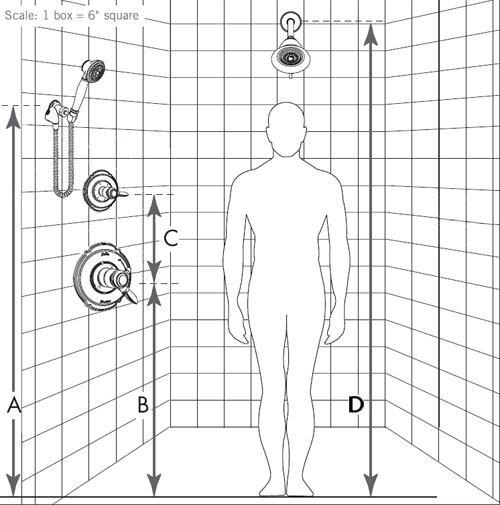
A. Floor to Hand Shower Mounting Bracket. Ideally, your hand shower should be mounted so that it can double as a second showerhead. You will want the hand shower to still be within easy reach of the shorter users so detaching it is simple if necessary. Having the hand shower mounted up high enough creates a multi-showerhead system that can be used hands free. Rather than installing two separate showerheads, shower systems with hand showers give you the best of both worlds! Consider getting a shower system hand shower with slidebar. On the slidebar the adjustable mounting bracket can move up and down, allowing you to modify the height whenever you like. We recommend installing the bracket such that the floor to hand shower sprayer measurement is between 72" and 84". If you have a hand shower with slide bar, you should try to set the top bracket of the slidebar at around that height.
B. Floor to Center of Mixing Valve Control Handle. Delta recommends the temperature control be placed around waist high, approximately 36" from the bottom of the shower enclosure. If you have a tub spout, the temperature control will need to be between 8"-18" directly above the tub spout.
C. Center of Mixing Valve Control Handle to Center of Diverter Handle. Typically the diverter is installed around 10-15" above the mixing valve control but in fact it doesn't even have to be installed on the same wall! Some people choose to install the diverter just inside the shower door for easy access. Depending on your shower layout, you may find placing the diverter separate from the mixing valve can offer a lot of utility. Most importantly, the diverter should be easily accessible for all users. Putting it in easy reach makes it so you can effortlessly adjust the settings to choose between showerhead and hand shower - or both!
D. Floor to Base of Shower Arm. The showerhead should be installed so that it is above the head of the tallest user, but still within reach of the shortest user. Depending on what type of shower arm you have (and how much bend it has), try to plan accordingly so the Showerhead is at least 84" above the ground. Ideally the tallest user should not have to crouch or duck under the showerhead to rinse his or her hair, while the shorter user should still be able to manually adjust the spray modes and angle of the showerhead. If you have a single setting or overhead rain shower that does not need much adjusting, installing it a bit higher on the wall is usually going to be a good idea.
*Figure in image estimated 6-feet tall.
The hot water supply and water pressure are critical in determining whether the system you've designed will be a success. Your water pressure should be at least 45 psi, plus you'll need to determine if you have 1/2" or 3/4" supply lines at your shower. Delta Custom Showers do not require 3/4" supply lines. For help in determining the demand on your system, we recommend consulting a licensed plumbing contractor and/or the water heater manufacturer to determine if the size and model of your water heater is appropriate. If your water pressure is too low, a pressure booster may be required.
As a rough estimate, to calculate the usage damages on Delta shower and handheld systems, you'll need to know the max flow rate of your hand shower and the max flow rate of the showerhead. These two flow rates added together represent the gallons per minute your system uses. Keep in mind, that you are using warm water NOT hot water. Hot water represents roughly 70% of the water coming out of your shower. The other 30% is cold water which does not make demands on your water heater. So you need to take your GPM flow rate e.g. 4GPM, multiply by 0.7 for your per minute hot water demands. Then you need to estimate how long of a shower you will take. The average shower is 8 minutes so a 4GPM flow rate x 0.7 x 8 minutes means you'll need a minimum of 22.40 gallons of hot water per shower. And you better leave some buffer! Once you have the shower of your dreams you may want to spend more than an average amount of time in there!
Remember, your home may have other hot water demands as well which is why this calculator doesn't really help determine what size water heater you'll need. It simply helps illustrate the demands your new Delta shower head with separate handheld system will place on it.
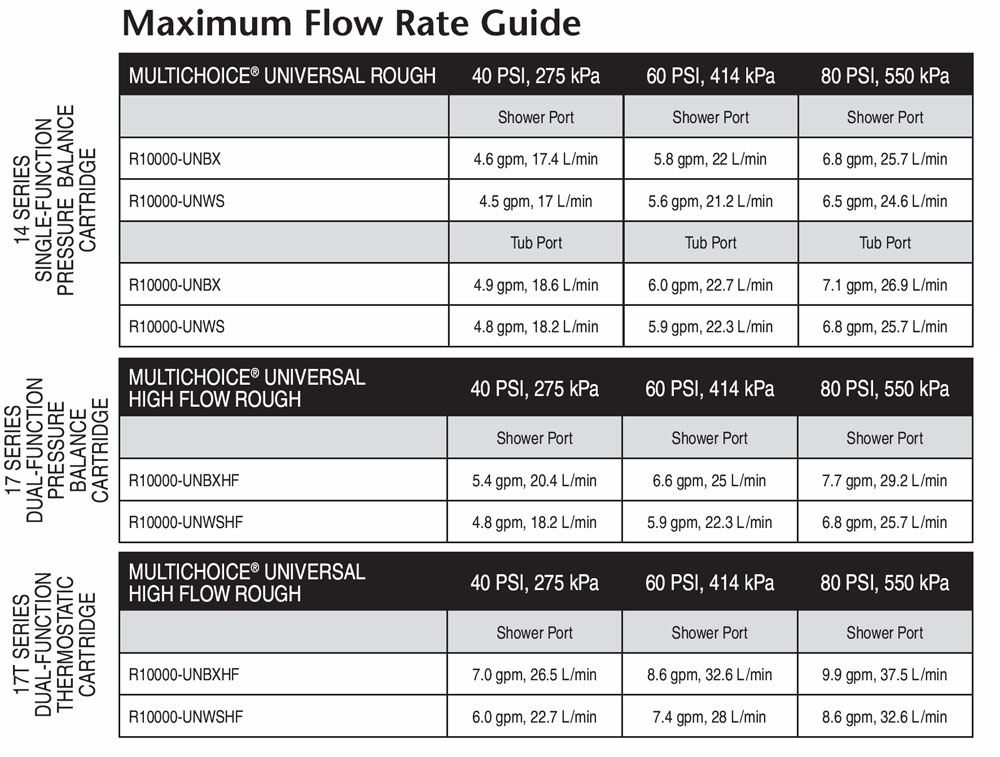
The maximum water pressure flow rate of a Delta shower system is determined by a combination of which rough-in valve you have installed in the wall and which cartridge your shower control handle trim kit contains. Take a look at the information below. On the left hand side you'll see the various shower cartridge series offered by Delta. In the middle you'll see the different valve part numbers and the estimated flow rate at different PSIs.
A shower drain is an important part of any shower, and it's even more crucial to have the proper drainage when you have a shower head shower system with hand shower. However, you may wonder, why can't I buy a drain from Delta too? It turns out shower drains are quite custom depending on the demands of your specific job site. It's not really possible to make a universal drain that will work for everyone. Delta recommends you have either two 2" drains or one 3" drain for your shower. Again this is a situation that having a licensed plumbing contractor can come in handy. Without proper drainage, water can build up and seep into your floor causing all kinds of totally avoidable problems. If you choose an overhead showerhead, do not position the drain immediately below it because standing on the drain could cause the shower to flood. Also, always make sure the shower floor slopes toward the drain, usually away from the shower door.
If you plan to install a shower bench, make sure the controls, and especially the hand shower, are installed near enough so they can be operated while seated. This is an important feature to consider adding to your shower. As we age, having a comfortable place to sit in the shower can be the type of thing that allows you to stay in your home long term. Even if you're young, take a load off! Your shower is for relaxing! So grab a seat, turn on your shower system hand shower, and enjoy a luxurious experience.
Thinking about the little details matters. In the plumbing industry, shower heads rarely include the shower arm and flange. This is because basically all showerheads fit on all shower arms. There are just so many possible combinations and use cases, companies typically price the showerhead and shower arm and flange separately. But you need to think about these things! A different shower arm can give your showerhead a further reach and really change the experience. The shower arm changes the angle the water will hit you and really make a difference. If you want an overhead rain shower effect, choose a longer shower arm with a right angle bend and install it high enough up that you can stand underneath. A decorative shower flange covers the hole where the warm water pipe for your showerhead exits the wall. This small piece makes everything feel 100% finished and done. Flanges can mimic the style of the shower control and other elements so don't forget you'll need one!
After looking at the infographic above, it might help to watch a short section (between 13:15 and 16.01) of the video below. The video gives a great look at a real rough-in job for a Delta Shower System with Showerhead and Hand Sprayer. The video does a great job explaining where to put the valves and where to stub out the pipes for the shower arm and hand shower wall elbow. Seeing a bathroom with all the walls open will give you a great idea as to how a shower system like is installed.
*Note, in the video at around the 13:55 mark, the installer starts talking about the 3-port diverter valve and how you can add on another showerhead or a ceiling mount showerhead if you want. It's true the Delta diverter valve would enable this, but if you want an additional spray outlet, you will need to switch to a Delta 6-setting diverter trim. Learn more in our Shower System Buying Guide. In this particular article, we only focus on 3-setting, 2 spray outlet shower systems where the 3rd diverter port is capped. Keep reading to learn more.
This step is identical to any shower faucet installation and is not specific to a multi-setting shower system with showerhead and hand shower. You need to run your hot and cold water lines either inside the wall or up through the floor to the shower mixing valve. As shown in the video, it's probably a good idea to install shut off valves on both the hot and cold water lines while the walls are open as this can be useful later if repairs are ever necessary. This may seem somewhat redundant if you have a mixing valve with stops, however extra ways to shut off the water are cheap to add at this stage and can really come in handy if work ever needs to be done in the future.
The Delta mixing valve installation is also identical to a standard shower faucet installation. The hot and cold water lines run into the inlet ports on the side. If you are installing a tub spout, leave the bottom port open. Otherwise, you should cap the bottom outlet port. When using a Delta HF (high-flow) valve, the bottom port is pre-soldered and capped by the factory. The universal valve is adaptable for use with different type of pipe: Copper, Iron, or Pex. Refer to the instructions included with the delta MultiChoice rough-in valve which cover the various installations here: You can also see them online here: How to Install a Delta R10000 Series Rough-in Valve
Installing a shower system diverter is the key to creating your shower faucet with handheld and showerhead. The diverter is the specific fixture that lets you separately control the hand shower and shower head in a Delta shower and handheld system. A 3-setting diverter trim kit features 2 individual settings and 1 shared setting. The rough valve installation however does not ultimately determine the function. When you look at the rough valve you will see 4 ports. The bottom port is the inlet port. Warm water from the mixing valve is plumbed into the diverter via the inlet port. In the case of Delta handheld shower systems with 2 spray groups, only 2 of the outlet ports will be used. The third port will be capped. From the outlet ports water is directed to the spray outlets by pipes in the wall. One pipe will be run to the hand shower drop elbow where you will attach the hand shower hose. The other will run to the shower arm where you will attach the showerhead. You can check out the instructions for installing the diverter valve online here: How to Install a Delta R11000 Diverter Valve
Shower systems with a hand shower and showerhead utilize a 3-setting diverter trim kit. The diagram below illustrates the 3 diverter trim kit handle positions and shows how the water flows through the diverter valve based on each setting. In a shower system with a separate showerhead and hand shower, Outlet 1 is assigned to the showerhead and Outlet 2 is assigned the hand shower. The 3 diverter settings allow you to turn on the showerhead only (1st position), the hand shower only (3rd position), or run both together at the same time (2nd position).
Shut off water supplies! Install the diverter so that the word “UP” (1) is facing upward as shown. Connect diverter to the desired valve. Remove plasterguard (2), bonnet (3), test cap and o-ring (4) prior to soldering. After soldering be sure to reinstall all parts. Line pressure can only be tested if the test cap and o-ring are installed and the bonnet is secured. Solder copper tubing (5) from diverter inlet to shower outlet of valve. Once secure, connect desired outlet devices. Note: Plug right port (6) if using a 3-function diverter cartridge.
The pipes that go to the toilets, sinks, showers and drains--as well as any pipes that vent to the roof--must be in place and tested before the walls are added. The process of laying these pipes, and putting protective plugs or caps to keep building debris out, is called a plumbing stub out.
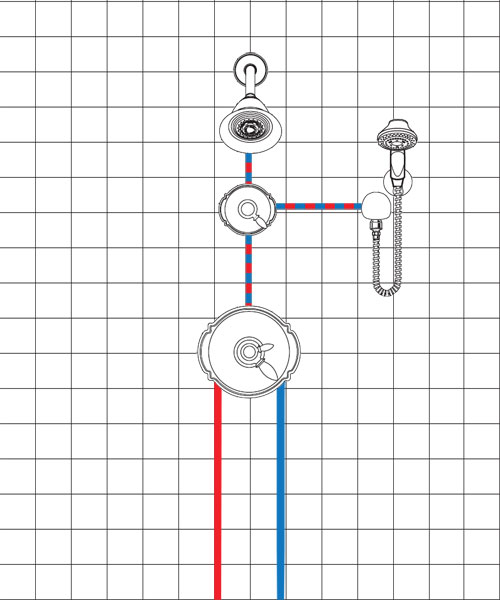
As mentioned before, once your diverter valve has been installed and connected to the mixing valve, you'll want to run a pipe from one outlet port up to the position the you plan to install the shower arm (and eventually the showerhead itself) and stub it out. You will also run a pipe from the second open outlet port to the location where you plan to connect your wall elbow to the hand shower hose. This should also be stubbed out.
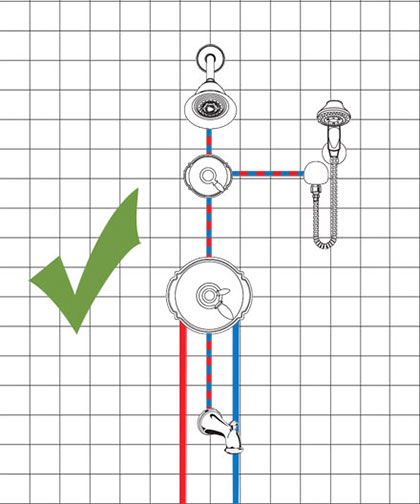
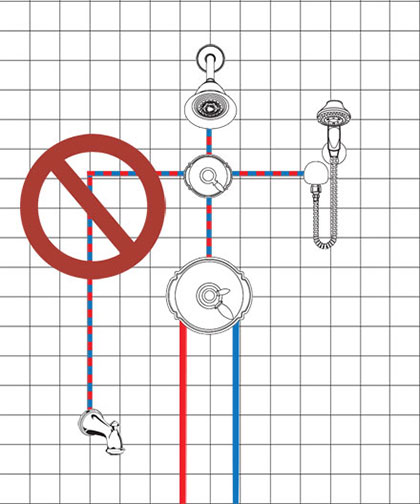
In the diagram showing how the pipes in the wall, red represents hot water, blue represents cold water, and red/blue together represents warm mixed water.
This step is outside of the scope of this installation guide as there are just so many different types of jobs. However, will be the same for any shower renovation project or installation and is not specific to a Delta shower head with handheld sprayer system install.
Attach the shower control trim kit and diverter trim kit in accordance with the manufacturer's instructions. The mixing valve trim kit will install differently depending on whether you have a 14 series, 17 series, or 17T series cartridge so consult your shower system specific trim kit instructions before installing.
The diverter trim kit and cartridge install into the diverter valve. The shower control handle trim kit and cartridge install into the universal mixing valve. The cartridges connect the valve and the handles you actually use to control the water. The trim kit pieces attach to the finished tile wall and connecting them is usually one of the final steps.
Make sure you have flushed the water lines before installing the cartridges and trim kits. When you first turn on the water, debris in the lines can clog the cartridge and cause it to malfunction. Make sure to flush the lines! This simple step is often overlooked by inexperienced installers.
Delta Shower Mixing Valve Trim Kits all contain a rotational limit stop. The rotational limit stop is basically just a plastic piece inside the shower control. This small fixture physically limits you from rotating the handle beyond a certain point to protect you from being scalded by water that is too hot. A pre-set maximum temperature determines how far you can rotate the your shower control handle before being blocked by the temperature limit stop.
If the water in your shower feels too cold, even when you rotate the temperature control handle all the way, you may need to adjust the rotational limit stop. Similarly, if the temperature of water is too hot, you can adjust it down. In parts of the country with greater temperature variance you may need to adjust the stop once or twice a year. The good news is it is super easy. No need to suffer lukewarm showers! Watch the video and you'll see what you need to do.
Most hot water heaters are set to 120-degrees so if adjusting the temperature limit stop doesn't help, you may need to check there.
Wrap plumber's tape around the treads and screw the shower arm into the 1/2" female elbow you stubbed out earlier. Slide the flange over the arm and thread on the shower head. Slide the flange forward and turn on the water. Look behind the flange into the hole in your wall to make sure there are no leaks - a flashlight may help. If everything looks good, use some silicone caulk to seal the flange to the shower wall.
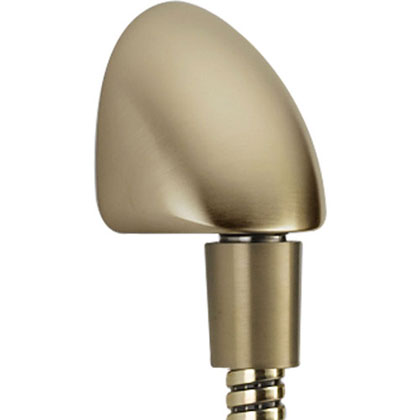
First, take a look at these instructions from the manufacturer How to Install a Delta Wall Elbow.
To install a hand shower drop elbow, apply plumber tape to threaded ends of 1/2" iron pipe nipple you stubbed out earlier (not supplied) and thread into shower riser elbow so that nipple extends past the finished wall no more than 1/2" and no less than 1/4". Place the supplied installation gasket behind the elbow. Thread the supplied installation tool onto the base of the elbow; then, using it for additional leverage (fits a 1/4 inch Allen wrench) screw the supply elbow onto the nipple making sure that the supply elbow outlet is in a downward facing position. Unthread install tool when finished. Minimum diameter for hole is 1" with a maximum of 1 1/2".
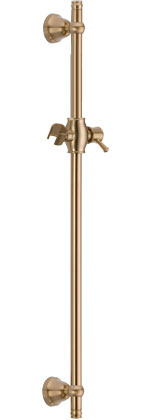
If your hand shower has a slide bar or a grab bar, make sure to double check all measurements before drilling in the mounting brackets. Make sure the slidebar is not in the way of anything like the shower door before installing.
Use a pencil to mark exactly where you want the brackets to be. Check with a level to ensure they everything lines up. Make sure you have the proper drill bit before attempted to drill through the tile. Bosch makes a glass and tile bit set which can work but all jobs are different so make sure to consult a professional. Drill smaller holes first and then enlarge them as needed to fit the size of your anchor. This will help protect the tile and also make the job easier. Once the anchors are in place, attach the hand shower slidebar.
If installing a grab bar hand shower, make sure to follow the directions exactly. A grab bar must be installed into a wooden stud if it's going to be able to support any real weight.
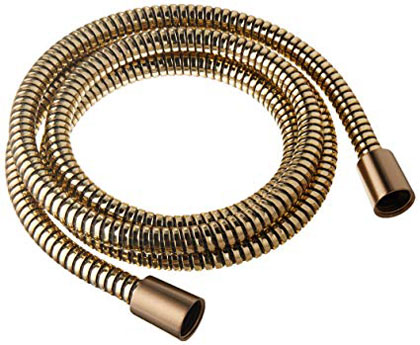
Attach the shower hose to the threaded supply outlet on the drop elbow. Proceed with the installation of the handshower, following the manufacturer's instructions. Typically all you need to do is thread the other end of the shower hose on to the base of the hand shower sprayer and tighten.
CAUTION: To avoid damage to the supply elbow, hand sprayer, or hose finish during installation, wrap with a cloth or tape and use only a smooth-jawed wrench. DO NOT OVERTIGHTEN CONNECTIONS.

We are based in California and so we are familiar with water usage regulations in the state. If you live in California and plan to install a delta handheld shower head system you may run into a few issues. The first of which is the flow rate of the individual showerhead and hand shower.
Because of drought in recent years, the California Energy Commission (CEC) maintains a list of shower heads which are approved for sale in California. Under Title 20 Regulations, shower heads are limited to a maximum flow of 1.8 gallons per minute and they must be registered on the list. This means you have to make sure that both the showerhead and the hand shower you plan to install as part of your shower system comply with the 1.8 GPM flow rate limit. You also need to make sure they are on the CEC registered list. This basically means you should order your shower and faucet with hand shower system from a larger brand (like Delta) that has gotten approval for their shower fixtures.
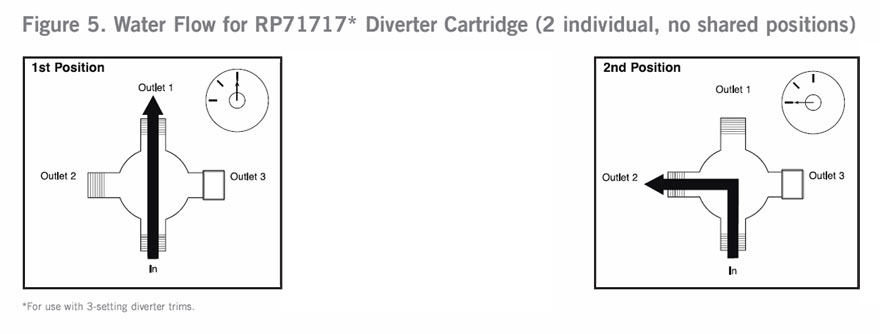
Second, even if the individual hand shower and showerhead are on the CEC approved list and can be shipped to your address, running the two spray outlets at the same time will put you over the 1.8 GPM water flow rate limit. Delta shower kits with handheld utilize a 3-setting diverter which has a shared setting which allows you to run both outlets at the same time. But 2 spray outlets each flowing at 1.8 GPM equals a total flow rate of 3.6 GPM which is above the limit. We have heard from many California customers that inspectors are increasingly enforcing the requirement that you utilize a non-shared function diverter cartridge.
To install a shower system with hand sprayer in the state of California your plans will need to consider the following three requirements:
So instead of having a 3-setting diverter with 2 individual settings and 1 shared setting, California Shower System installations require a non-shared function diverter cartridge with just 2-settings. The 2-settings allow you to run one spray outlet at a time individually, and remove the shared setting option.
There is still a lot of utility offered by a Delta shower system with hand shower even with a non-shared diverter cartridge. It's still great to have a hand shower option when you need it. However you should be aware before planning a shower system installation in California that there will be this limitation.
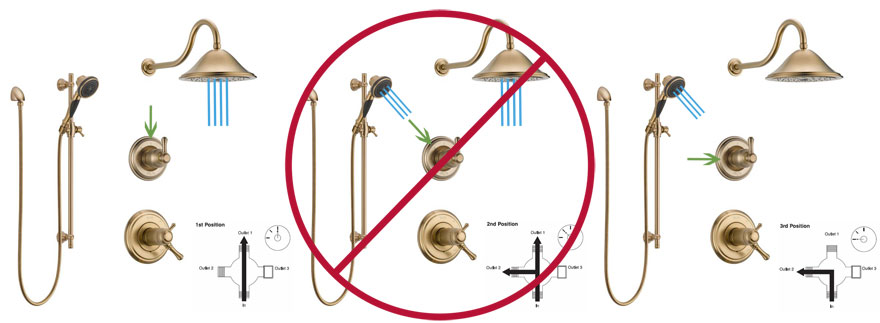
*Note, the large rain showerhead in the example shower system above is not approved in CA due to 2.5 GPM flow rate.
When more than one valve is being used in a system, do not tee from the 1/2" water supplies to accommodate the second valve. Each valve should be plumbed directly from the main water supply.
Water pressure is very important to the performance of a custom shower system with showerhead and hand shower. Water pressure should be a minimum of 45 psi, and a pressure of 80 psi is recommended for an optimal experience. We do not recommend installing any of these showers on a well system. The water pressure and water volume that is delivered by a well system is usually not adequate for the demands of a custom shower system. As a result, you may be unhappy with the outcome.
It is against national codes to remove the flow restrictor from any outlet device. There are cases where homeowners remove the restrictor, but Delta strongly discourages this practice. Removing the flow restrictor will upset the balance of the system you design, negatively impact system performance and void the warranty.
Installation must be in accordance with local plumbing codes. System performance varies with local supply.
Using multiple elbows can decrease flow from the outlets.
People often ask us if they can add a tub spout to their shower system. The answer is yes! However it is important that you understand the way the tub spout should be plumbed if you want the optimal results. There is a right and a wrong way to do this and a professional plumber will definitely be an asset here.
Delta recommends that you install the tub spout below (and connected to) the bottom port of the mixing valve*. When you initially turn on the water in a Delta shower system with shower head and hand shower plus tub spout, the water will flow through the tub spout. The water output from the mixing valve will be allowed through the tub spout and will flow freely at full force. To activate the showerhead and hand shower functions, you will pull up the diverter on the tub spout.
*As noted previously the bottom port of all Delta (HF) high flow mixing valves is permanently capped so to add a tub spout we recommend you switch to an R10000-UNWS valve.
What you DO NOT want to do is run the tub spout off a shower system diverter outlet. Delta does not recommend this and neither do we. The reason being is that the diverter restricts the flow of water to a level that will not be suitable for use with a tub spout. While fine for a showerhead, the diverter ports flow restriction makes it so the tub spout will not flow fast enough to fill you tub in a reasonable amount of time.
Take a look at the proper and improper Shower System with Hand Sprayer, Showerhead, and Tub Spout installations below.
Make sure to check out our Pre-built Complete Shower Systems with Hand Shower, Showerhead, and Tub Spout!
Even the most knowledgeable of installers may run into a situation they have never seen. While this shower system installation guide is long, it is by no means exhaustive. Luckily Delta Faucet themselves is an absolutely stellar resource. Their technical support team has seen just about every kind of situation you can imagine and probably many you can't! If you get stuck at any point of your installation, we highly recommend you reach out to Delta.
Not only is Delta helpful with installation questions, they also really do stand behind their products. The lifetime warranty offered by Delta on all their fixtures really means something. We have been authorized Delta distributors for many years and consistently see them go above and beyond for their customers. Save this phone number and if you every need parts, help trouble shooting an issue, or installation advice, they are ready to assist.
All the planning and hard work will definitely be worth it once you get to the end result: Your very own BEAUTIFUL new Shower System with Hand Spray and Showerhead. Your daily shower routine will never be the same again! Get energized and take control of your day by spending each morning is your dream bathroom. Your shower will sure to be the best in the neighborhood! Take a look and get inspired by the wonderful bathroom shower designs below!
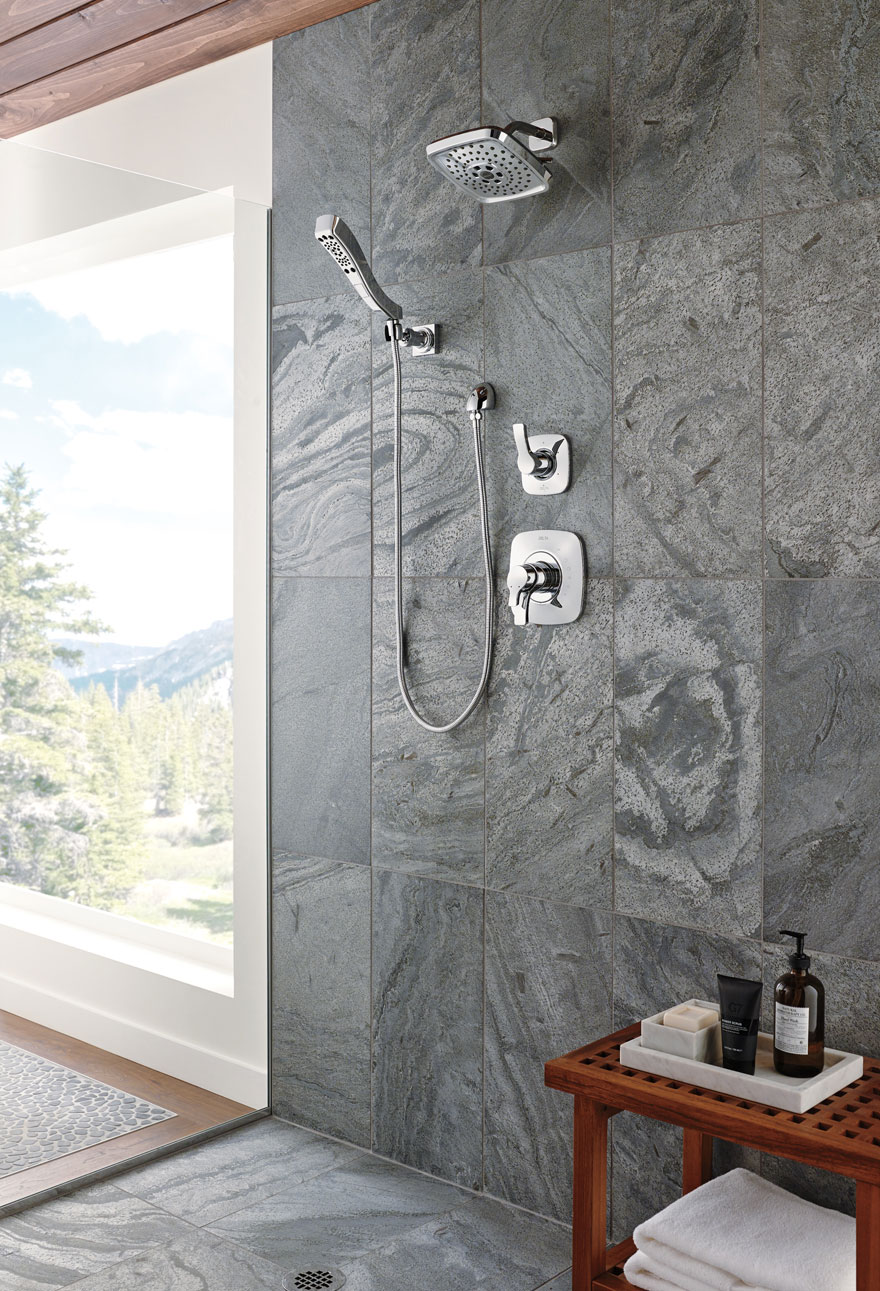
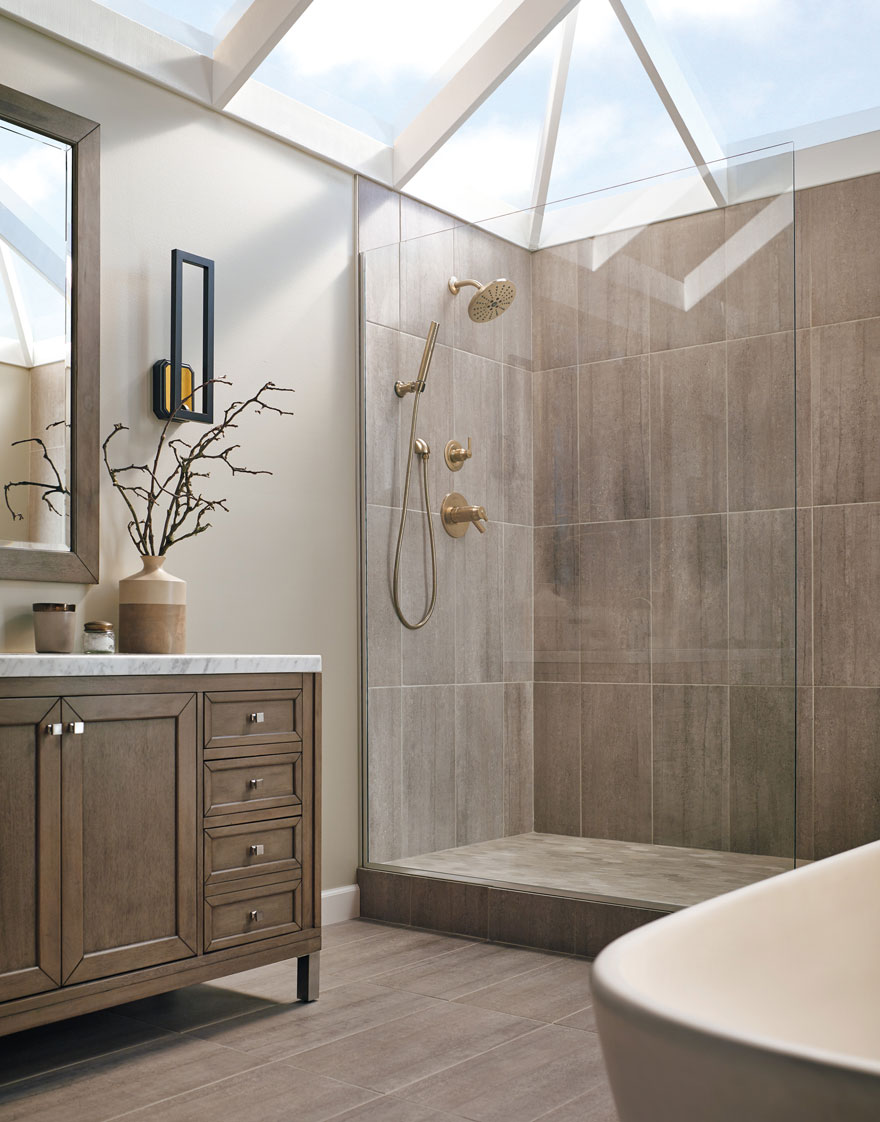
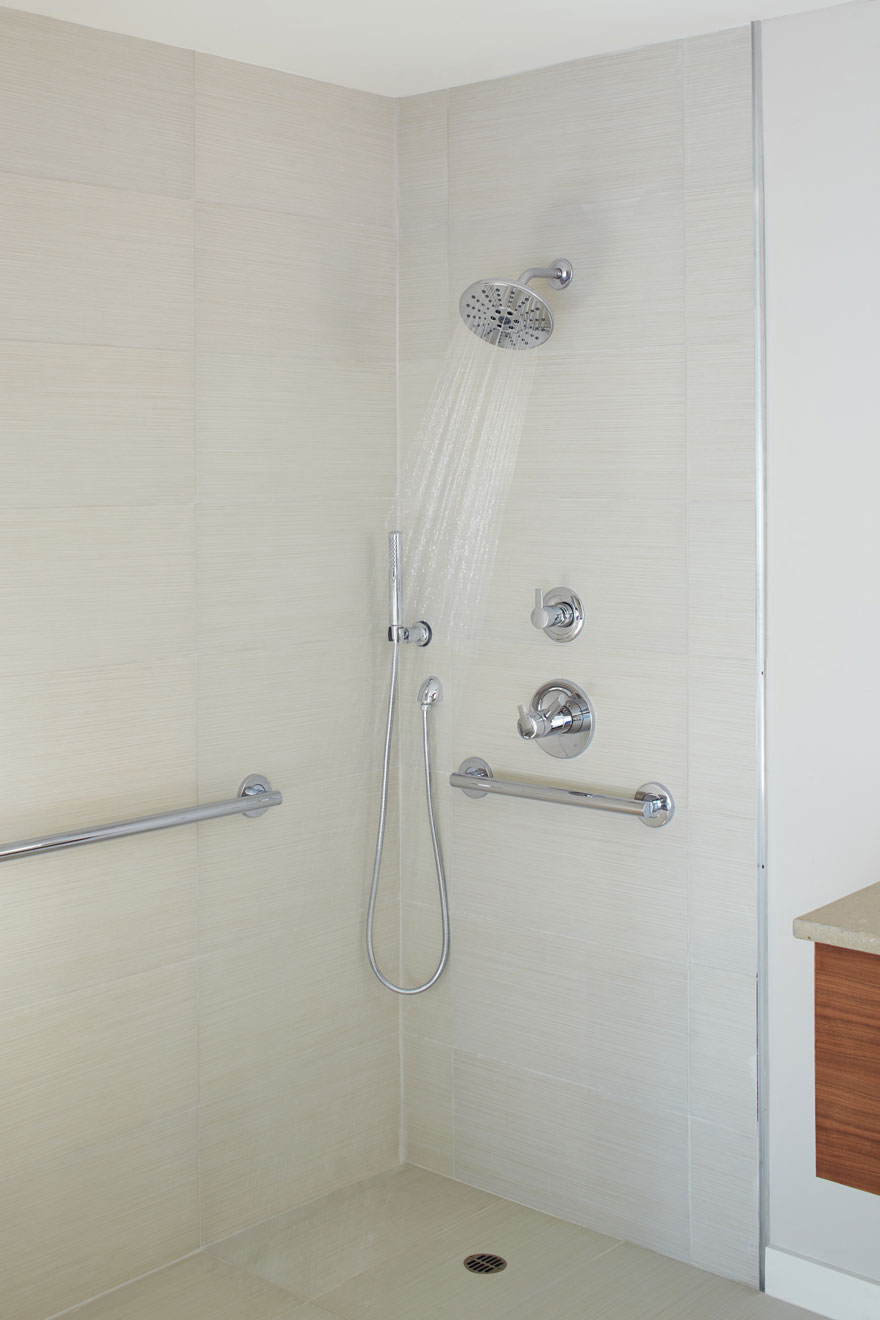
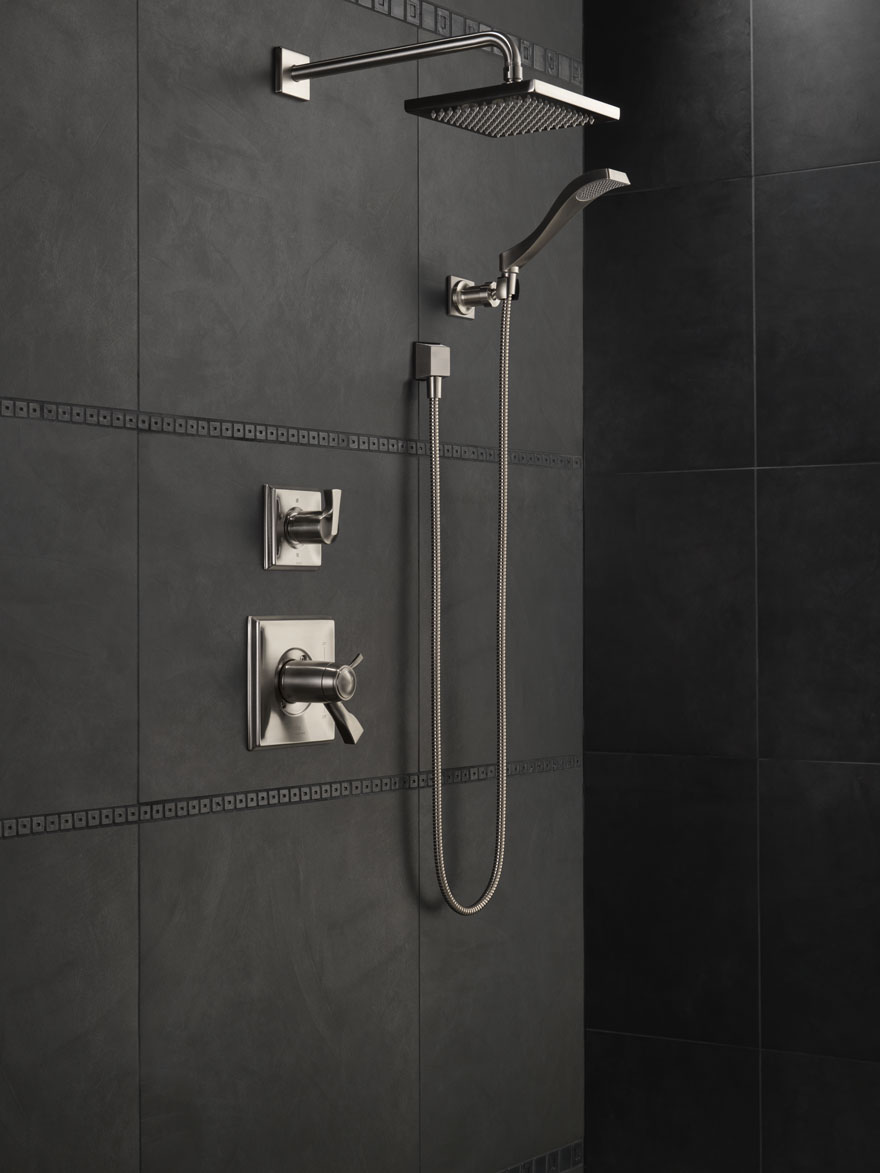
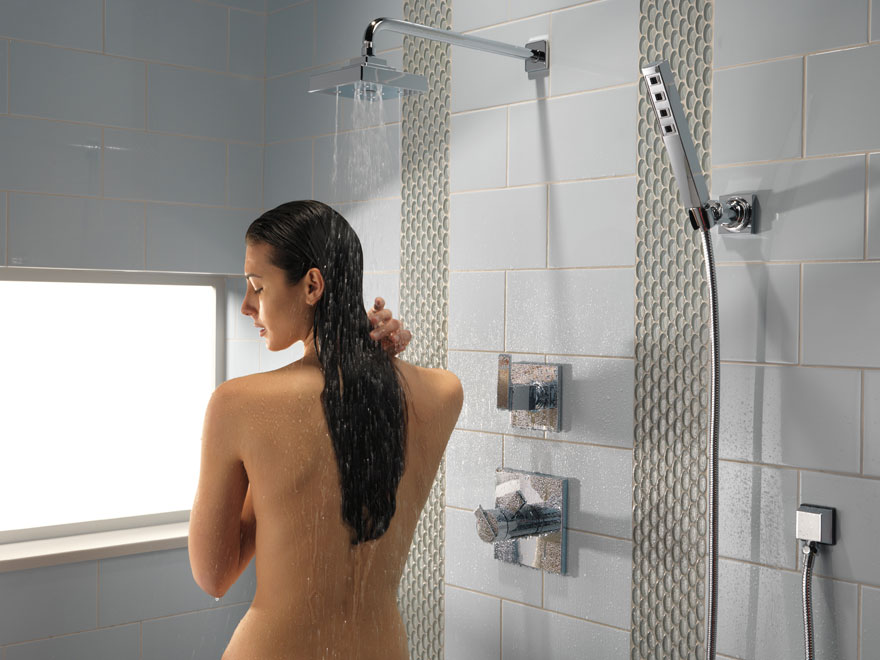

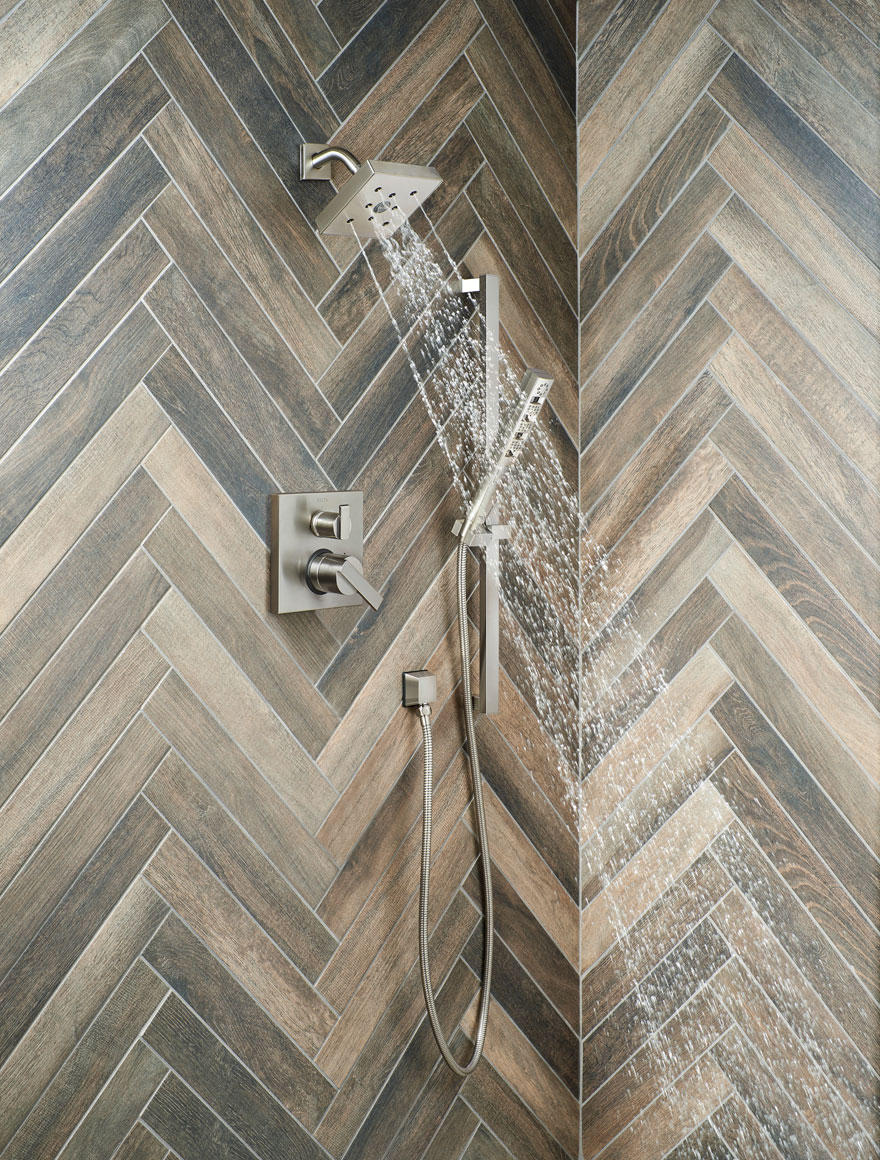
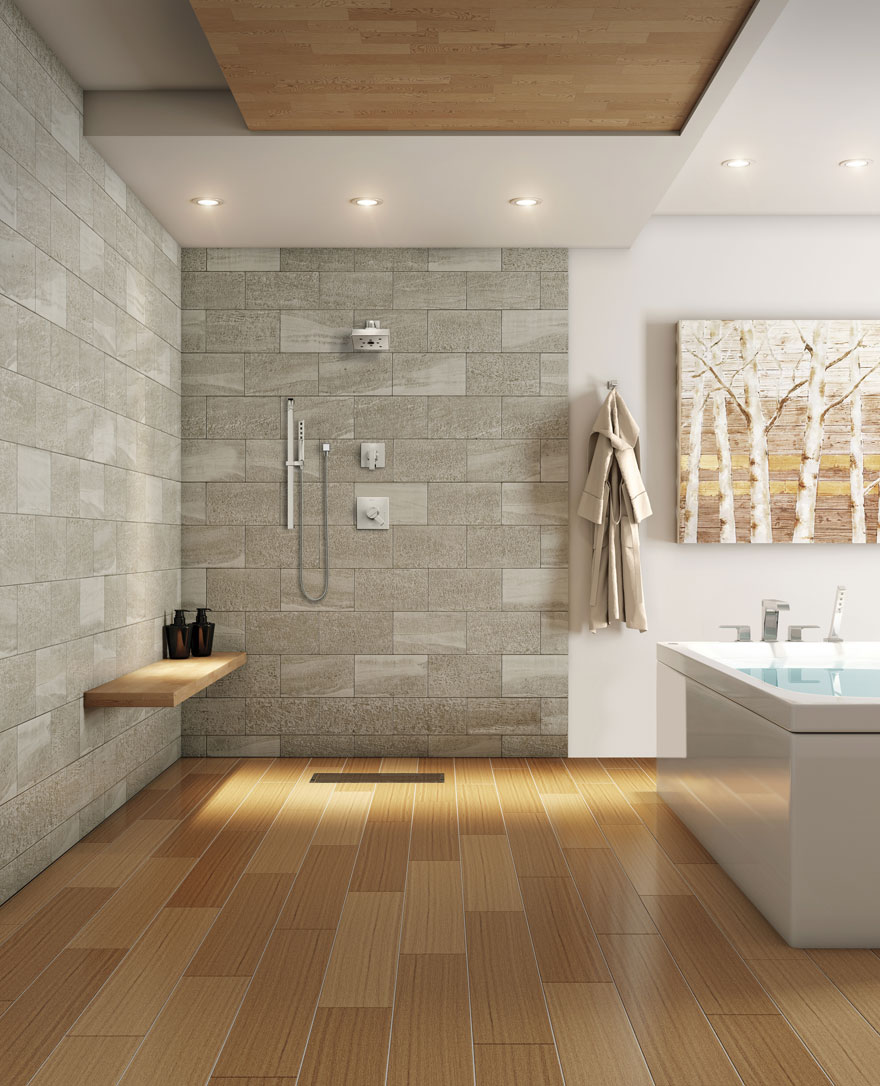
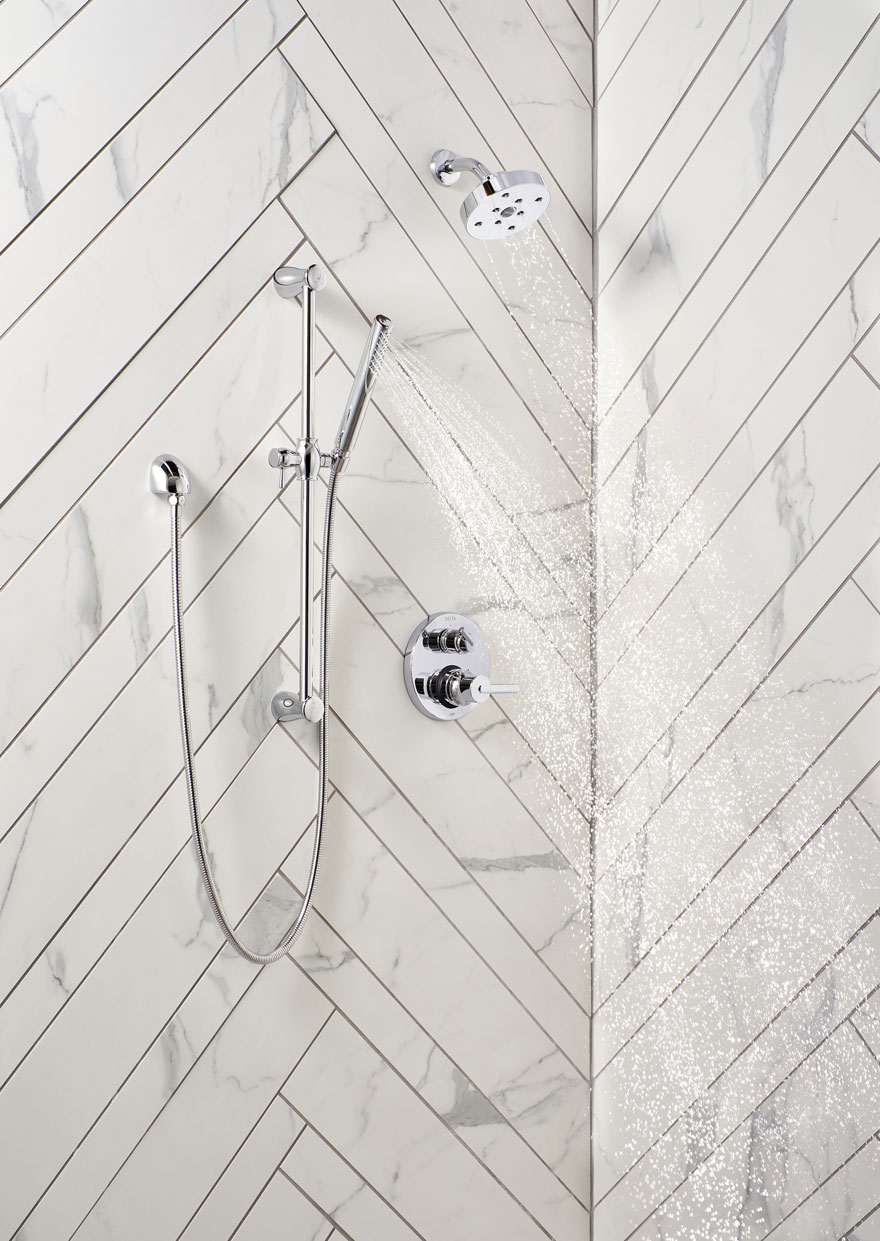
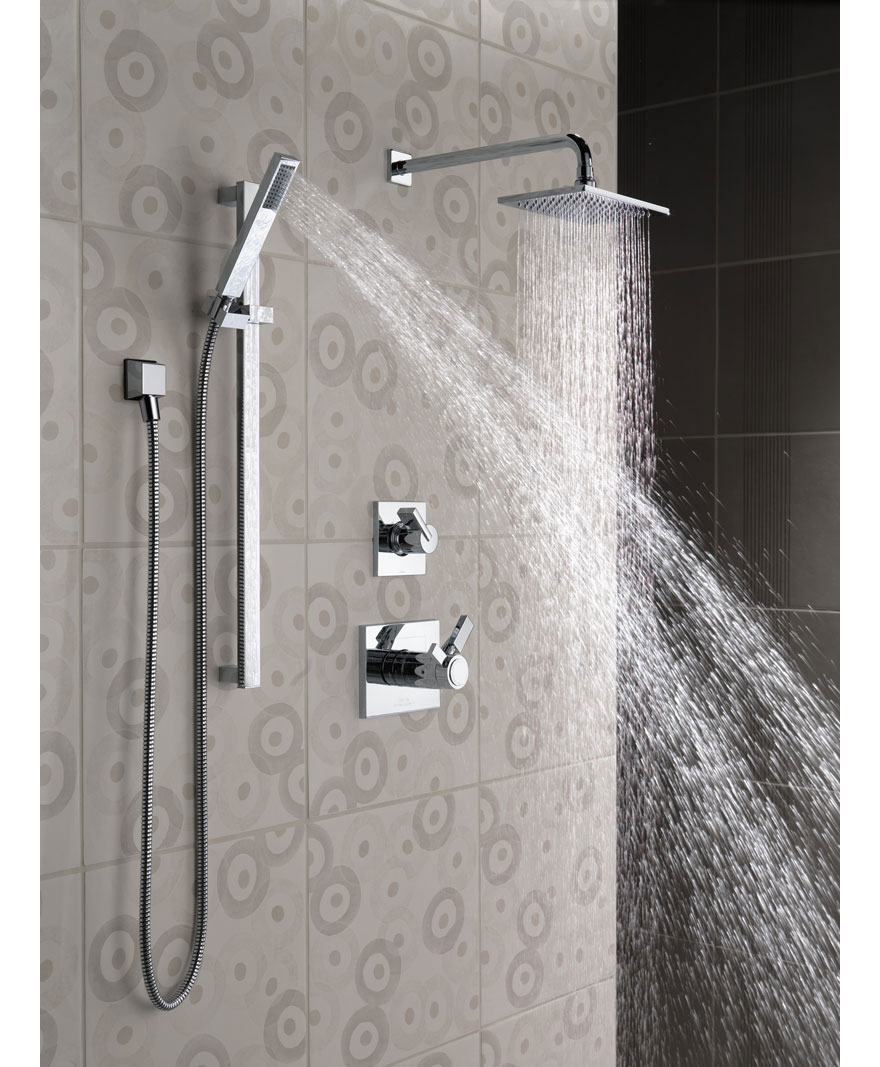
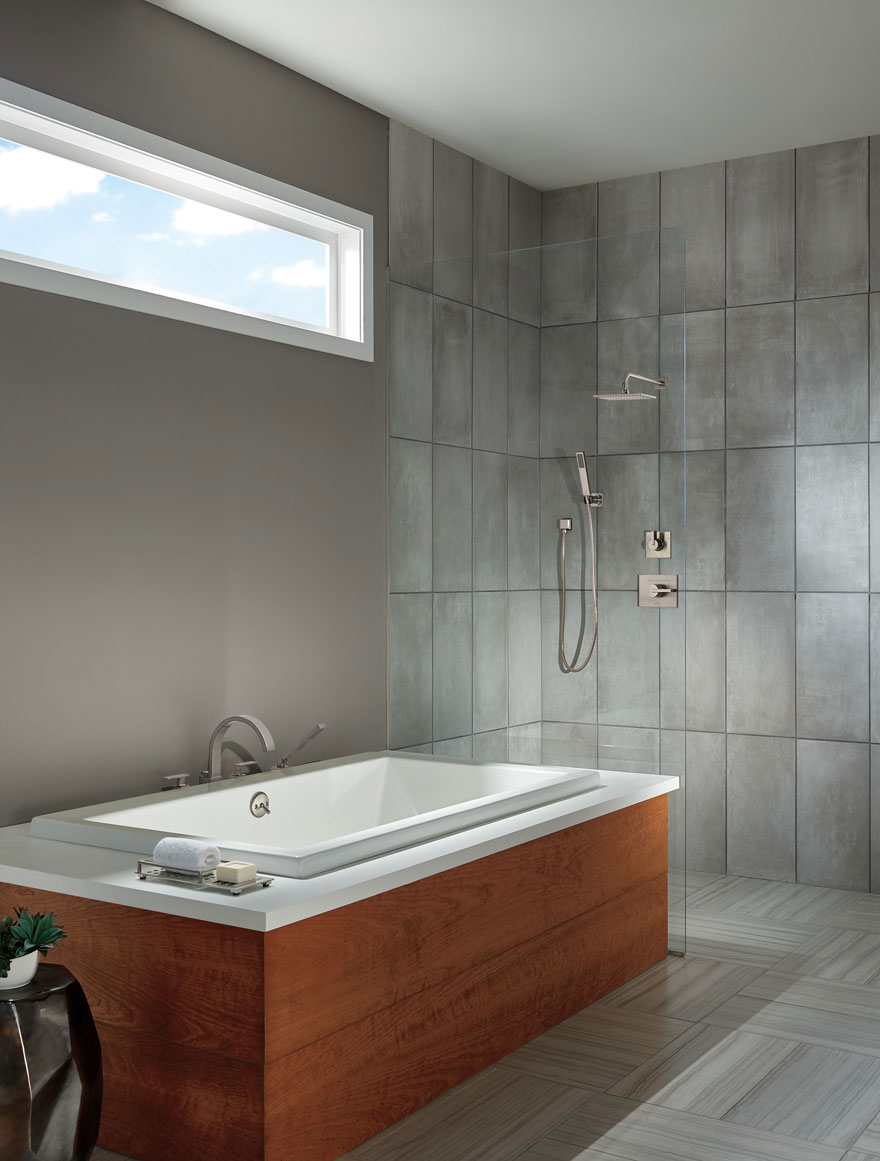
It may seem like a lot of planning and a lot of work to install a shower system with showerhead and hand shower. For a professional plumber or contractor however this is usually a pretty standard project. It's become increasingly popular to have a separate hand shower system, especially in the master bathroom, because of how much utility these fixtures offer. But forget about utility for just a minute and scroll up to really look at the beautiful shower system installation images above! Imagine how blissful it would be to wake up every day in a serene setting with your own personal spa hand shower system waiting. Imagine how energized you'd feel getting ready every day if you got to take your morning shower in a space like this! Imagine a long relaxing hot shower after a hard day at the office in your master bathroom oasis. Get inspired and plan your shower system today! If you're stuck and don't know how to get started, get some inspired and check out our Pre-Built Complete Hand Shower with Showerhead Systems!
If you found this guide helpful please "like" us on Facebook. We appreciate your support!
Disclaimer and Disclosure: faucetlistmart.com does not accept money, gifts, samples or other incentives in exchange for special consideration when preparing our buying guides. However, we do receive a referral fee from online retailers (such as Amazon) when readers click over to their websites from ours. As an Amazon Associate faucetlistmart.com earns from qualifying purchases. This helps cover the cost of operation of our free blog. Thanks for your support.
Co-founder, faucetlistmart.com, Plumbing Industry Experience: 25+ years
Nick Kuzmin has been working with or around plumbing products for over 25 years. This lifetime of experience has given him a large amount of useful and practical knowledge on almost all plumbing related topics which he freely writes about and shares online. Nick co-founded faucetlistmart.com with his father Jim in 2011.
Im in the middle of a bathroom remodel including totally redesigning my shower. After reading other comments, if I understand this right, the placement of the drop elbow supply for a handheld shower is totally personal preference?
Hi Joan, we never recommend you plumb a tub spout off a diverter port as the diverter restricts the flow rate. This restriction is not noticeable in a showerhead or hand shower, as those use less water than a tub spout. Delta’s official guideline in literature they publish is the same. I’m not sure if the phone rep you spoke with just didn’t know this.
It is of course possible to plumb the tub spout off a diverter port (i.e. there is no reason it won’t work), but the flow rate will be less than if you plumb it the correct way, off the mixing valve. This means the tub will fill slower than it would otherwise.
It’s basically impossible to say how your diverter valve and plumbing was set-up without ripping out the tile to actually look.
A 6-setting diverter has 3 shared settings and 3 individual settings. All 3 outlet ports on the diverter valve would be used.
If you plumbed a non-diverter tub spout off 1 outlet port, a hand shower off the 2nd outlet port, and a regular showerhead off the 3rd outlet port, and use a 6-setting diverter trim kit, you should be able to run any individually, or any combination of 2 at the same time. None of the outlet ports are capped in this case.
Unfortunately the only person who can really help solve this type of issue is a plumber physically at the jobsite. Basically you are either stuck with it “as is” or you will have no choice but to rip open the wall and see what is going on, and see if something with the plumbing can be corrected. This is really now a question for a plumber.
To answer your specific question. The 3-function and 6-function diverter use the same Delta R11000 diverter valve (not sure how this differs from the Brizo R60700 valve you mentioned but Brizo and Delta have the same parent company).
Both 3 and 6 setting trim kits have the same issue with reduced water pressure and we do not recommend installing a tub spout off a diverter port for either type.
As I mentioned before, there is nothing preventing you from installing it that way and the only real downside would be water flow rate. Based on your description of the issues, it seems you may have something else going on.
Good luck with your project, I sure do hope it all works out!
I am interested in the section of your article that discusses a tub spout, shower head and hand held configuration. I purchased the Brizo Pressure Balance Valve Trim with the Delta universal Multichoice tub/shower valve R10000. The diverter rough is a Brizo 6 Function Diverter R60700. At the time I was purchasing all products, the showroom insisted I did not need a diverter tub spout. Based on your article, I contacted Delta to verify and they agreed, non-diverter tub spout would work. My plumber was impossible to reach at the time. I decided to take a leap of faith. My plumber just installed and yup he says I need a diverter tub spout and I won’t have full use of the 6 functions – can run shower and hand held at same time but no other shared functions. I contacted Delta again and they insist he must have plumbed it wrong. I was having a hard time with the Delta Rep explaining exactly how it should have been plumbed but she said he probably capped the wrong port. I suspect the plumbing should be as in your “wrong” diagram, but wouldn’t all ports be in use and nothing capped?
I showed the plumber your 2 diagrams and he plumbed it as your first “correct” Diagram and agrees connecting the spout to the diverter as in your “wrong” diagram would not work due to the reduced water flow. Of course it is all tiled and trim installed. The plumber is going to contact Delta but says they always plumb as the first diagram.
I’m told a Hand Held in a Tub/Shower set up is common so I don’t know why this has become complicated and why the showroom and Delta are insisting a diverter tub spout is not necessary. However, I believe your article focuses on a 3 Function diverter, so can you tell me if a 6 Function Diverter can allow the tub to be connected to the diverter? And is there any down side to plumbing that way – reduced pressure, water dribbling out of other sources not in use?
Hi Joan, It’s possible to plug any of the diverter outlet ports (including the top port!) but I see how this could be a little confusing. As long as you install the diverter cartridge correctly, you can plumb the hand shower from the right, or left port. It’s also possible to run the piping from the left outlet port over to the right behind the wall which may make sense in some instances. This is where a professional plumber really come in handy. A professional plumber will know the best way to configure everything to work with your particular layout and your particular circumstances. With regards to your question about Brizo, typically valves made by different manufacturers are not compatible with each other. That being said, Delta and Brizo are both owned by the same parent company. There are quite a number of different valves out there however so I cannot confirm compatibility in all cases. This is something again you would want to discuss with your plumber, or contact Delta and/or Brizo to confirm. You would need them to help identify your existing valve and provide guidance as to what trim kits may fit. Thanks!
I’m confused. Under the section, Diverter Valve Installation, it specifically says, “ Note: Plug right port (6) if using a 3-function diverter cartridge.”. But in the picture titled The Pipes in The Wall, it shows outlet 3 being used for the handheld instead of the one on the left. Also, is the Delta Universal rough-in diverter valve compatible with Brizo valve trims?
Hi Jen, the 14 series single handle control will have enough water pressure to power a showerhead and handheld shower. What you have to keep in mind when it comes to water pressure is how much does each spray outlet use. So if you have a hand shower and a showerhead both running at the same time, will the valve put out enough water so you can get the maximum flow rate. Currently the federally regulated maximum flow rate is 2.5 Gallons per minute (gpm), so with 2 spray outlets, your shower system would use 5 gpm. This would be fine for a 14 series Delta shower cartridge. The other limiting factor when it comes to water pressure has to do with the actually water pressure (PSI) in your home. If you have generally good water pressure coming from the city (60-80 PSI) you shouldn’t have any issues with water pressure. If you are running off a well or have other limiting factors, you would want to consider that before installing a multi-spray head shower. Hope this helps! Thanks
Thank you for this article. However I have one question still. I much prefer the look of the 14 series single handle volume and temperature control without the additional plastic piece on top of the metal handle. Which in my opinion much cheapens the look of the shower system. My question is if installing a diverter valve and a separate hand held shower system, will the 14 series single handle volume and temperature control provide enough volume to operate both the showerhead and handheld systems simultaneously? I would greatly appreciate any information on this
Hi Juli, the hand held shower and the normal shower head can be placed on the wall wherever you want. It just depends on how the pipes are run inside the wall. Of course you should consult with your plumber to make sure there is nothing special about your room that would be a limiting factor, but it should be no problem to have a shower system set up with these items 4-5 feet apart. Hope this helps! Thanks
How far apart can the shower head and the hand held shower be placed? I want to have them about 4-5 ft apart. Or do I need a 2nd control valve?
Hi Hasan, Delta shower systems will only work with Delta rough-in valves. So you would be required to use a Delta valve. Delta only makes one shower diverter valve so you wouldn’t be able to change that piece, however the mixing valve does have more than one option available. We recommend the Delta high-flow rough-in valve, however you can use any R10000 series Delta rough-in valve as the base for a hand shower with showerhead system. Hope this helps! Thanks
Hi, can I change the shower valve? And if you can get some information about it
Comments will be approved before showing up.
A rain shower head system in your primary bathroom brings a luxury spa feeling into your home and the best ceiling mounted rain shower head systems allow you to enjoy this spa relaxation magic on a daily basis! Read this guide to learn everything you ever wanted to know about rain shower systems with ceiling mounted showerheads. Using our 40 years experience, we will teach you everything you need to know on how to build your own rain shower system and show you some gorgeous sample installations along the way!
Kitchen remodeling and renovations can be daunting, time consuming, and demanding. Even with all the challenges that may come with renovating, updating your kitchen is never a bad idea. Choosing new finishes, fixtures, appliances, and materials really helps you connect with the space and make your kitchen yours. Check out our article on the top 10 kitchen remodeling and renovation ideas for 2022. You'll see tons of great images and learn about all the hottest design trends. Read the article now!
 Small bathrooms can sometimes be difficult to design. Fortunately, you can check out our Top 10 Small Bathroom Design Ideas for inspiration! Traditional bathroom designs typically feature larger cabinets, separate tub and shower stalls, double vanities, and other fixtures that just won't work in a small space. As home trends change and people become more adventurous with unconventional spaces, we are seeing more and more small bathrooms featuring highly functional fixtures and stunning designs! In this article you will see lots of beautiful small bathroom pictures and learn about clever fixtures designed to work perfectly in small spaces!
faucetlistmart.com
October 15, 2021
Hi, the placement of the drop elbow supply for your shower system is up to you. Obviously it is contingent on where the pipes are actually run inside the wall, but you more or less have freedom to place the outlet basically wherever you want. I recommend you discuss any installation questions with your plumber however as there could be jobsite specifics that may limit the available options for where you can place wall elbow. For example, sometimes there are issues running a pipe to certain locations inside the wall due to barriers or other things inside the wall (like electrical wires). Good luck with your project!